Hi Everyone! I apologize for the recent hiatus! A lot has been going on lately. This includes: hosting two exchange students from Hong Kong and being the Dungeon Master for a good ‘ole fashion game of Pathfinder (D&D)!
Today I want to share my famous Kale chips recipe! I have been getting a lot of demand for the recipe so I thought I’d try to write it out as I have been making it. Of course this isn’t completely original to me, it is a variation of what I learned at The Raw Food Institute and online recipes. I do things a little different based on my own tastes and availability of ingredients. To be honest every batch I make is a little different since I rarely measure ingredients and am always experimenting. Try throwing some fresh garlic in for some extra kick, or add some turmeric and curry for a different kind of spice!
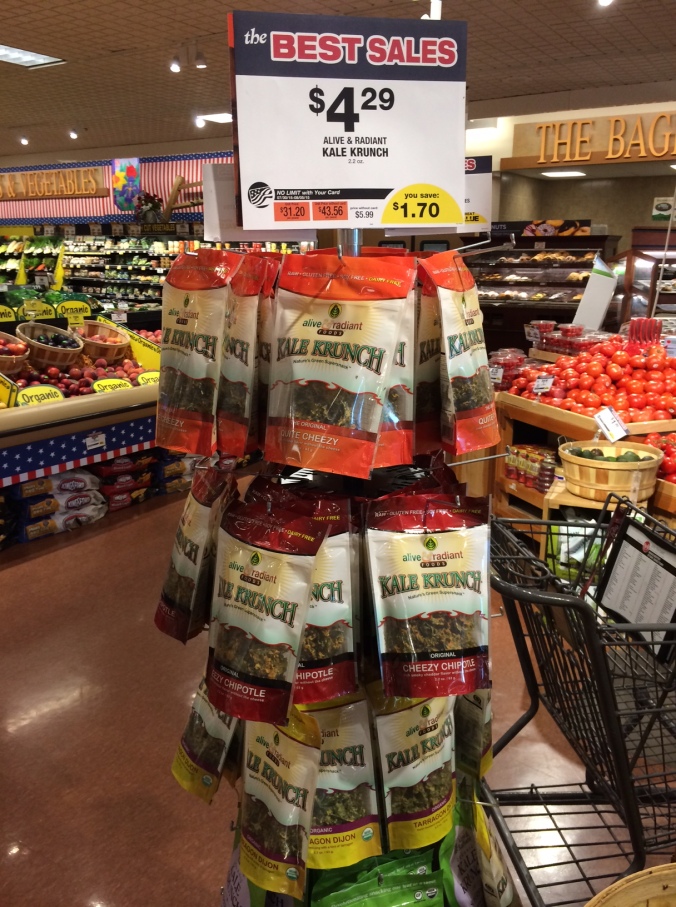
Recently I have been bringing these chips to family parties and getting rave reviews! Somehow when kale is dehydrated it becomes the perfect chip consistency without the chip carbs or the oxidized low quality oils. Not only is kale a nutritional powerhouse but preparing them with this recipe also increases the good fats and spices in your system leading to an extremely satisfying snack! And while there are some great options for kale chips at the grocery stores, they are pretty expensive for a very small bag! And if anyone has tried these chips before: a small bag from the store won’t be enough!

Small bags of Kale Chips might be good for you to get a taste, but the real satisfaction comes from making your own big batch!
For basic equipment you will need a reliable blender such as a Blendtec, Vitamix, or fill-in-your-favorite brand. I use a Blendtec that I bought used on eBay. The other key piece is a food dehydrator or low temperature oven. The instructions for cooking in the oven is in the recipe linked above. I prefer my dehydrator, which is a 9-tray Excalibur brand purchased through an online retailer on eBay. I love the dehydrator because I can set it and forget it without worrying about running back and preventing the batch from burning. I’ve left batches in the dehydrator for 3 days without any issue. The other benefit is that cooking below 110F keeps the leaf in its “raw” state preserving it’s enzymes and nutrients. However, there is a school of thought that kale should be steamed to reduce some of the natural toxins that protect it in the wild. No matter which way you do it, finding appropriate ways to get more kale into your system seems like a good thing!
For sources of kale this time of year is prime time to pick it up at a local farmers market. If not there then check for sales at grocery stores or Whole Foods. It’s great to buy the kale and nuts while they are on sale then make big batches of chips! If done correctly you will be saving a lot of money versus buying your kale chips at the store.
Most recipes for ‘cheesy’ kale chips call for a whole fresh sweet red pepper. I definitely suggest making the recipe at least once this way because it makes it taste impossibly like real cheese! I personally am not a fan of sweet red peppers, so through my experiments have come up with the substitution with paprika powder and cayenne or chili powder. It also makes it simpler to not have to worry about having fresh red peppers on hand.
The only other odd ingredient to mention is Nutritional Yeast. This item is what gives the recipe its profoundly cheesy flavor. It is not an active yeast and is technically raw vegan. You can usually find the Red Star brand or Bragg’s brand on some odd bottom shelf in most grocery stores near the baking supplies or dry cooking supplies.
Now onto the recipe! Be sure to read the recipe through once before beginning as some of the prep work should be done ahead of time. I wrote a lot of extra hints that I thought would be helpful if you are doing it your 1st time.
“Cheesy” Vegan Kale Chips – Home Style
Ingredients:
1 bunch kale – Any variety
1 cup raw (unsalted) cashews
1/2 cup raw (unsalted) sunflower seeds (try a batch without sunflower seeds for a more creamy outcome)
1/2 cup nutritional yeast
4 tablespoons extra virgin olive oil
2 tablespoons lemon juice (juice from half of a lemon)
1 teaspoon cayenne pepper or chili powder (add more for more kick!)
2 teaspoon paprika
salt – to taste (doesn’t need much, if any. Start with 1 teaspoon)
optional: garlic powder (or fresh garlic), tumeric powder, curry powder, or any flavor to fit your fancy!
1/3 cup water (may vary, see instructions below)
Recipe Instructions
1. Soak the cashews and sunflower seeds for at least 1 hour and up to 12 hours. Drain and rinse when you are done soaking them.
1st time tip: They can soak out on the countertop in a jar of water and just make sure there is enough water to keep them submerged and account for some expansion. If you don’t have raw cashews or raw sunflower seeds, that’s ok too! You can use whatever you have. Just note if they are salted you probably don’t want to add salt later.
2. Rinse off your kale and dry it out.
1st time tip: If you don’t have any fancy drying methods then toss it in the dehydrator (or oven very low) for a few minutes to dry it off. Having dry kale is key to getting a good coating later on.
3. De-stem the leaves from the kale. Rip into chip-size pieces.
1st time tip: Hold one hand on the end of the stalk, and use your other hand to pinch down on the start of the leaves closest to the stalk. Pull through towards the tip while keeping your fingers pinched and you should be able to remove all the leaves from the stalk in one swift motion. Then just rip those leaves a few times and you are golden!
4. Toss the nuts, oil, lemon, nutritional yeast, water, and spices in the blender! Its that simple! Start blending on high until smooth.
1st time tip: If the blender is having a tough time blending or the consistency looks chunky, then add in a little water, punch it down with a spatula, and try again. I do this iteration a few times to get it just right. You want to get it as smooth as possible but also as thick as possible. That is probably why I always underestimate the initial water amount.
5. Place your kale into a large bowl. Pour or scoop your mixture over the kale. Then toss it all together and get a good coating over all the kale.
1st time tip: Use your hands! Its extremely gratifying.
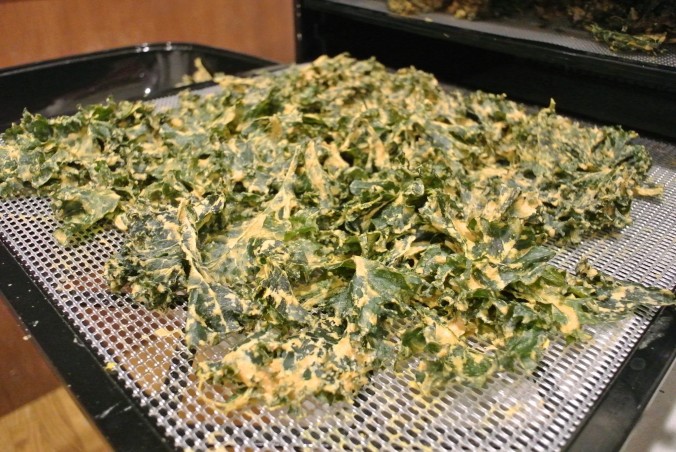
6. Place the goopy kale on your dehydrator trays or cooking trays in a single layer. Spacing between the pieces is good for efficient drying, but not really required.
7. Run the dehydrator or oven! Refer back to this recipe for oven guidance. I set my dehydrator for 105F (the lowest setting) and let it run for about 18 hours. My dehydrator has no timer so it keeps running until I pull it out.
8. Bag or package it up! Enjoy at home, served with meals, or as a snack on-the-go!
Thanks everyone! Let me know how you like your chips!
-Andrew


Yummy yummy! Looking great!
LikeLike